Notification Management
Background
Notifications are a relatively high-touch feature. Unlike low-visibility backend tasks such as model runs and training, notifications are more about interaction between users. Different users also have different expectations for notification frequency.
So I separated notifications from the overall core logic to avoid excessive notifications causing disruption for some users.
Now you can integrate notifications into your system with simple configuration in the settings page.
The core flow has two steps:
- Configure notification sources and notification targets
- Configure notification tasks
Notification Source Management
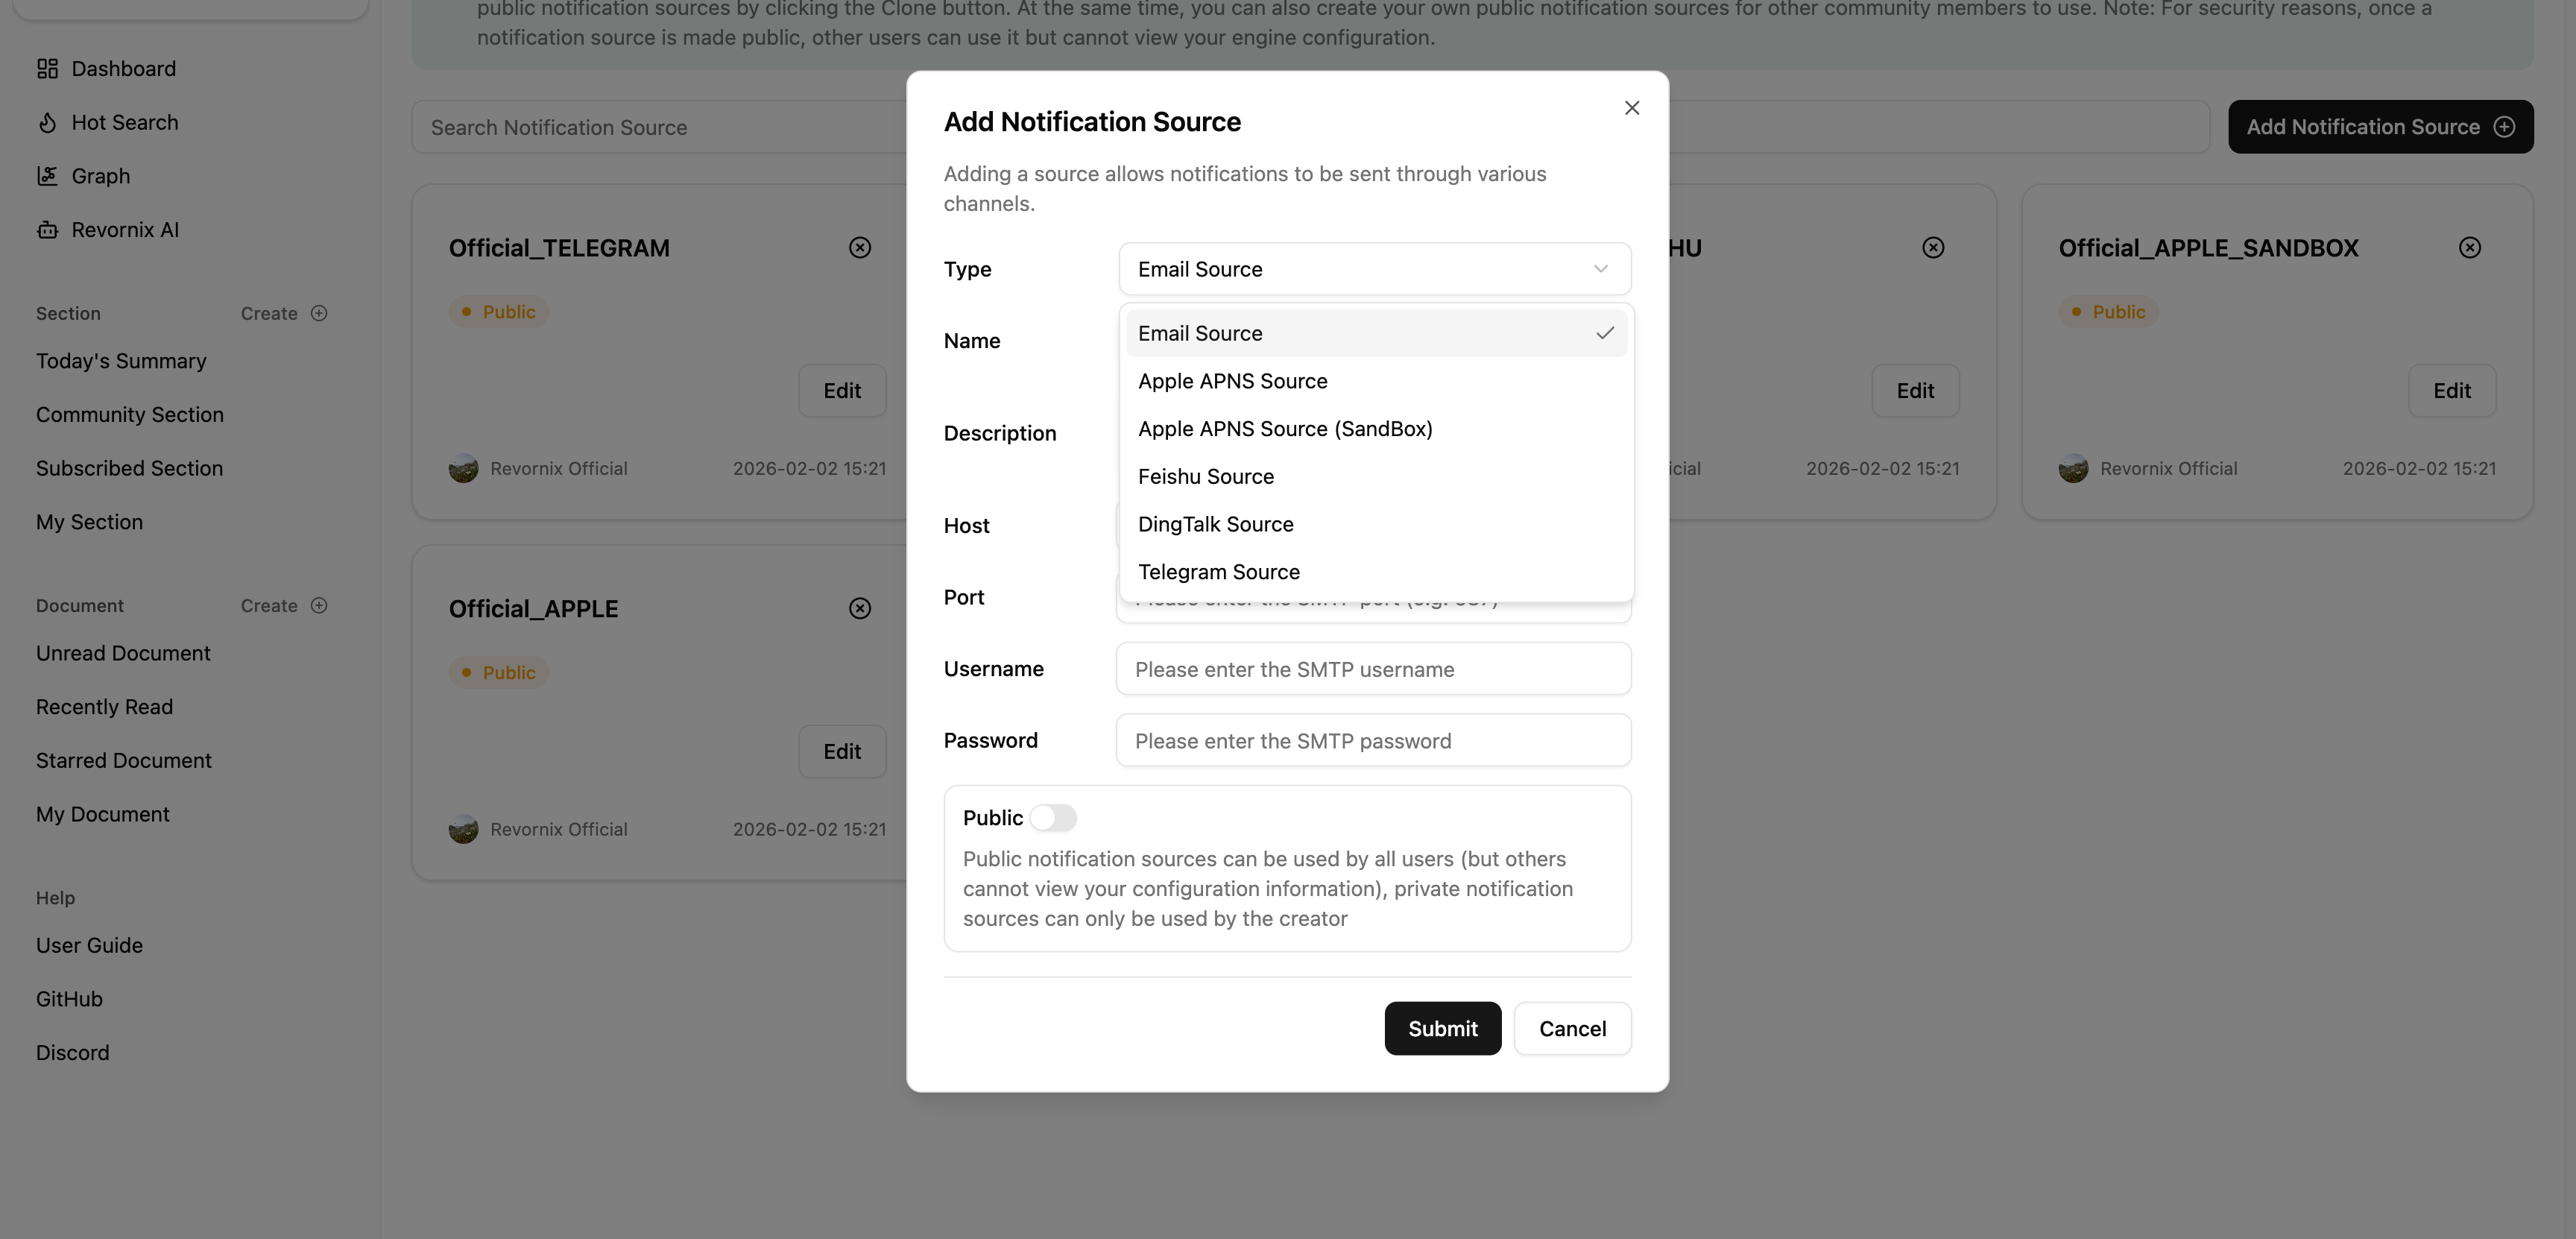
The following notification sources are currently supported.
This source requires configuration. Set host and port based on your email provider, and fill in your email account and credentials for username and password.
| Parameter | Description |
|---|---|
host | SMTP server address |
port | SMTP server port |
username | Email account |
password | Email password credential |
Note: the password here is not your mailbox login password. It is the SMTP authorization code. Please refer to your email provider’s documentation for how to obtain it.
For example, in 163 Mail, you can get the SMTP authorization code this way: after enabling SMTP service, a popup appears, and the displayed string is the SMTP authorization code. To use this source, SMTP service must be enabled.

Feishu
This source requires app_id and app_secret.
| Parameter | Description |
|---|---|
app_id | app id of your Feishu custom app |
app_secret | app secret of your custom Feishu app |
Because Feishu does not support directly linking external files and images in notifications, you need to configure a bot that can upload files/images to Feishu. Also, using a bot from a custom app makes it easier to extend capabilities later.
Feishu setup steps:
- Go to the Feishu Developer Console , create an enterprise custom app, then open the app details page. Copy
app idandapp secretinto the configuration.
- Enable image upload permissions for the custom app.

DingTalk
This source does not require configuration parameters for now.
Apple APNS
Configuration for this source is relatively complex. See Apple docs for details: https://developer.apple.com/documentation/usernotifications/sending-notification-requests-to-apns
| Parameter | Description |
|---|---|
team_id | Team ID of your Apple Developer account |
key_id | Key ID of your APNS key |
private_key | Private Key from the downloaded .p8 file |
apns_topic | APNS topic, which is your app Bundle ID |
- Go to the Apple Developer website and sign in with your Apple Developer account.
- Find
Membership detailsto get yourTeam ID. - Open the
Certificates, Identifiers & Profilespage, create a key, and configure it. Make sure APNS is enabled and the environment is set (Production/Sandbox).
- On the key details page, you can see
Key ID.
- Click Download to download the key file. The file content is your
Private Key. apns_topicis theBundle IDof the app you want to push notifications to.
Apple APNS (SandBox)
Same as above, but your Key must be for the sandbox environment.
Telegram
This source requires bot_token.
| Parameter | Description |
|---|---|
bot_token | Token of your Telegram bot |
- Open Telegram and search
@BotFather.
- Click Start (skip if you already did).
- Enter
/newbot.
- Follow prompts to set the bot display name.

- Follow prompts to set the bot id. It must be globally unique in Telegram and end with
bot.
- After creation,
BotFatherreturns a message containing the bot token. Copy it into the configuration.
Notification Target Management
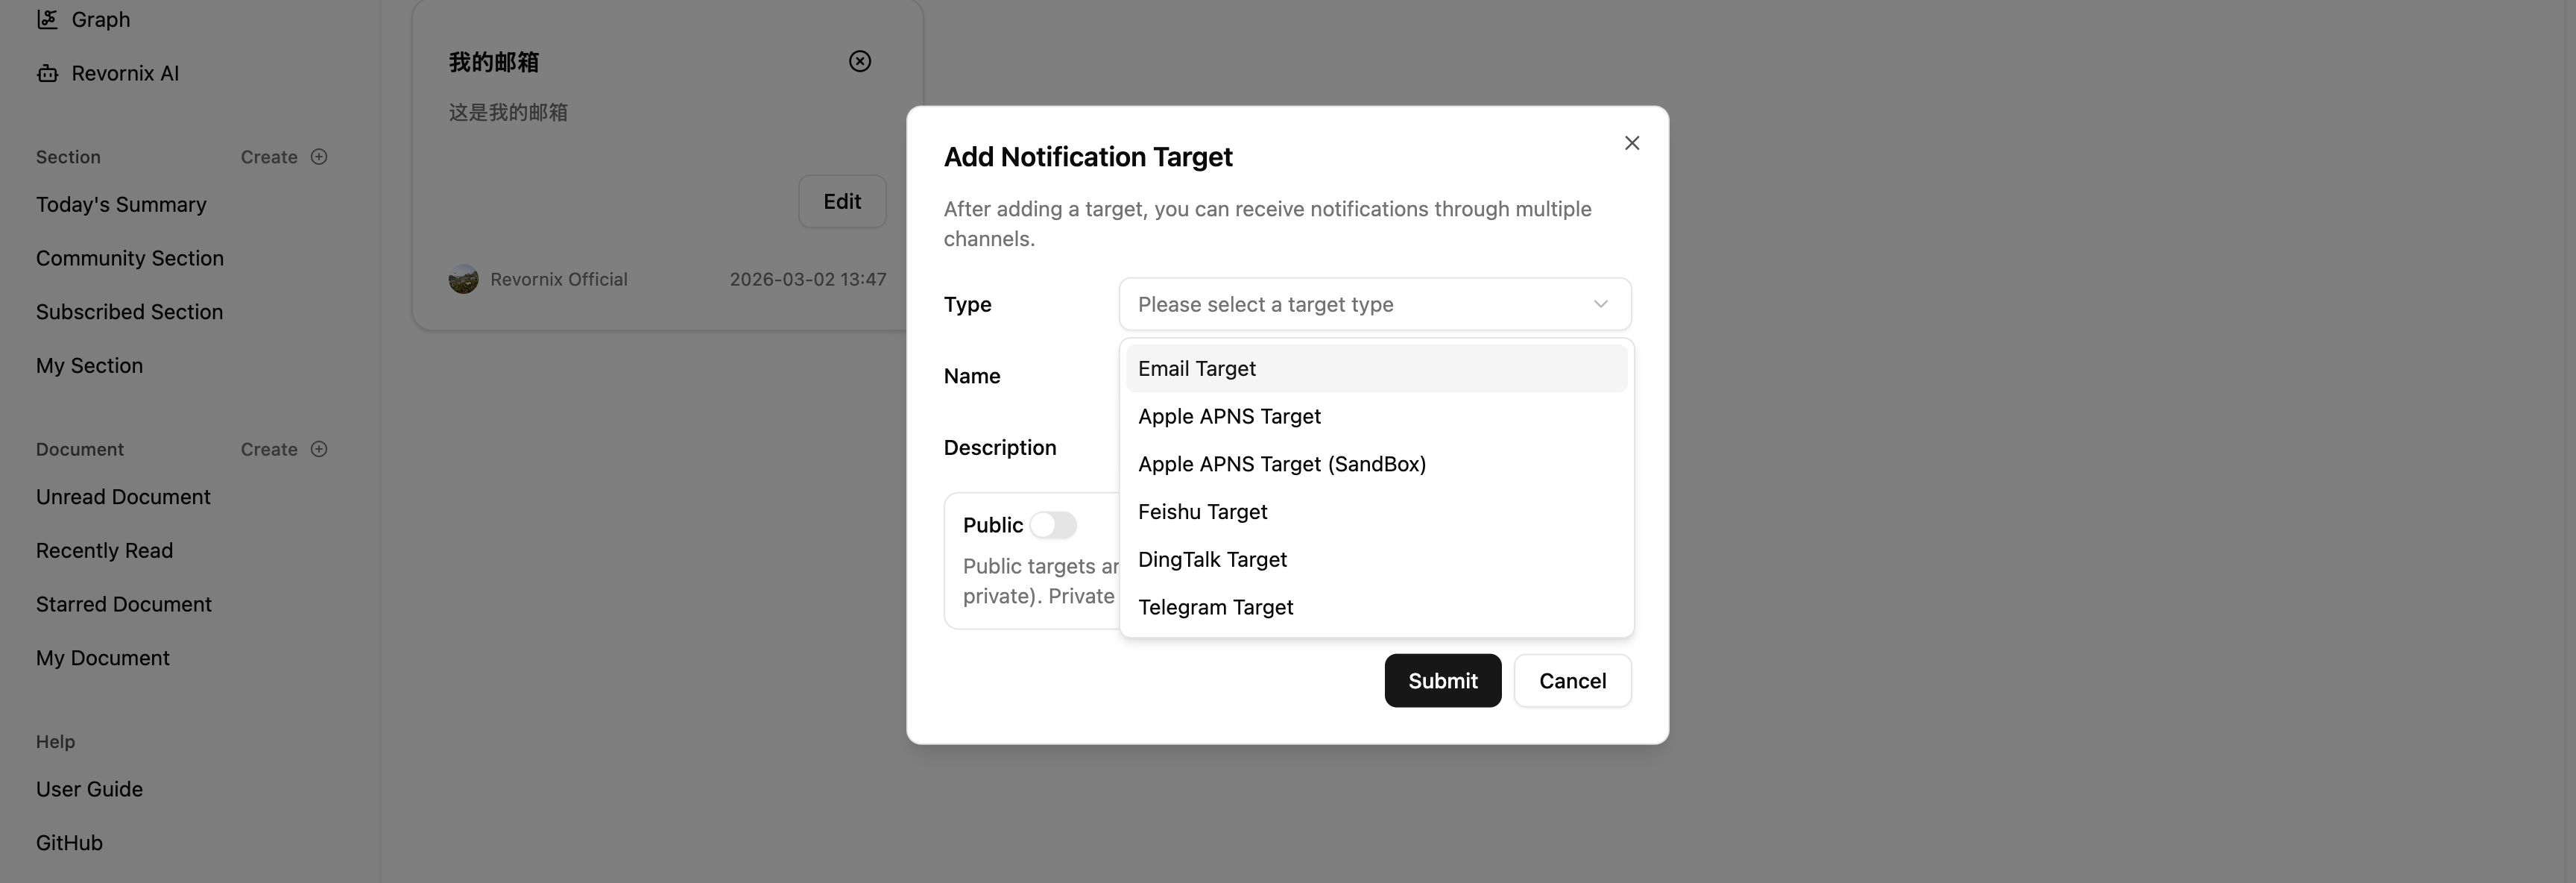
To prevent notification abuse, you must verify that the notification target belongs to you.
The following notification targets are currently supported.
This target requires configuration parameters.
| Parameter | Description |
|---|---|
email | Email address you want to send to |
Feishu
This notification target requires configuration parameters.
| Parameter | Description |
|---|---|
webhook_url | Feishu webhook URL |
sign | Feishu webhook signature |
- Create a custom webhook bot in a Feishu group.

- Open bot configuration details and enable signature.

- Copy
Webhook URLandsignatureinto the configuration.
DingTalk
Same as Feishu above.
Apple APNS
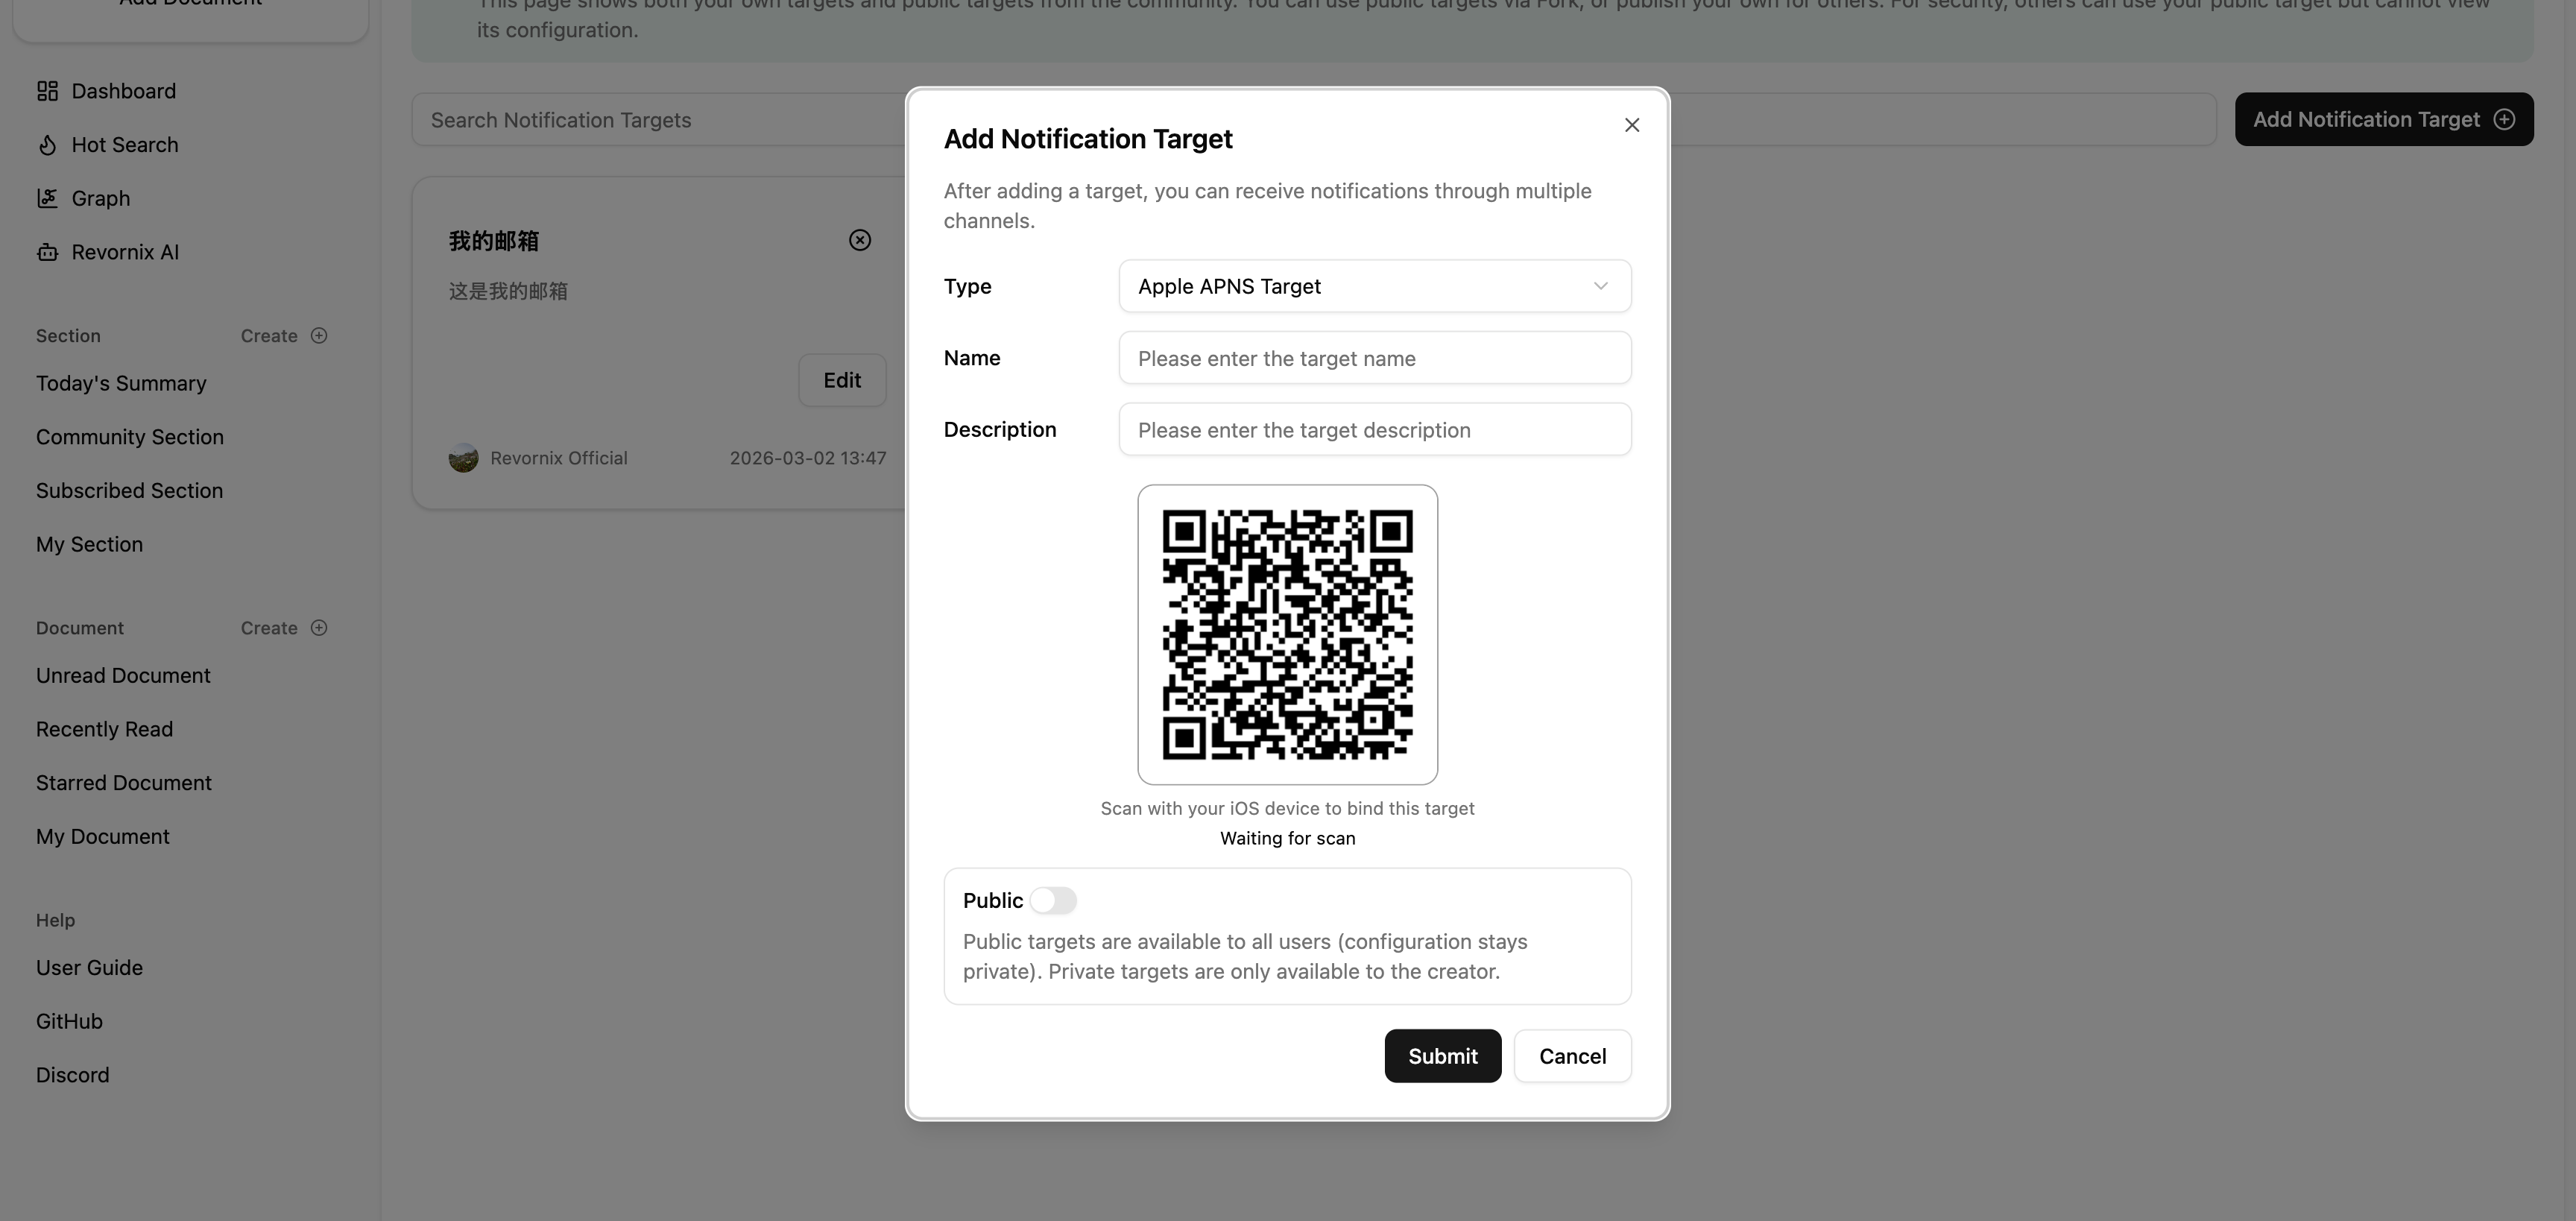
This notification target must be used with the Revornix iOS/iPad app. Bind the device by scanning with the scan button in the top-right corner of the “Me” page in the mobile app. If you have not installed it yet, please download from the App Store. (The mobile app has not been officially released yet. Please wait a bit.)
Apple APNS (SandBox)
Same as above.
Telegram
| Parameter | Description |
|---|---|
chat_id | ID of the Telegram group chat |
- Create a new Telegram group.
- Invite your Telegram bot into that group.
- Send any message starting with
/in the group. - Open
https://api.telegram.org/bot[your bot_token]/getUpdates(replace[your bot_token]with your bot token), then search for the message you just sent. - Find the id in the response, copy it, and fill it in the configuration.

Notification Task Management
Note: Notification sources and notification targets must match, otherwise notifications cannot be sent. The supported mappings are shown below:
| Notification Source | Notification Target |
|---|---|
| Feishu | Feishu |
| DingTalk | DingTalk |
| Apple APNS | Apple APNS |
| Apple APNS (SandBox) | Apple APNS (SandBox) |
| Telegram | Telegram |

Both time triggers and event triggers are supported. You can choose based on your actual needs.
Event triggers currently support only:
- RemovedFromSection: You are removed from a section
- SectionCommented: A section you created/participated in is commented
- SectionSubscribed: A section you created/participated in is subscribed
- SectionUpdated: A section you participated in/subscribed to is updated
Both custom notification content and template notification content are supported. If you need real-time dynamic messages, you must use template content, because custom content is fixed at configuration time and cannot be changed dynamically.
Currently available templates:
- Daily Summary Template: Daily summary template
- Removed From Section Template: Notification template for being removed from a section
- Section Commented Template: Notification template for section comments
- Section Subscribed Template: Notification template for section subscriptions
- Section Updated Template: Notification template for section updates